

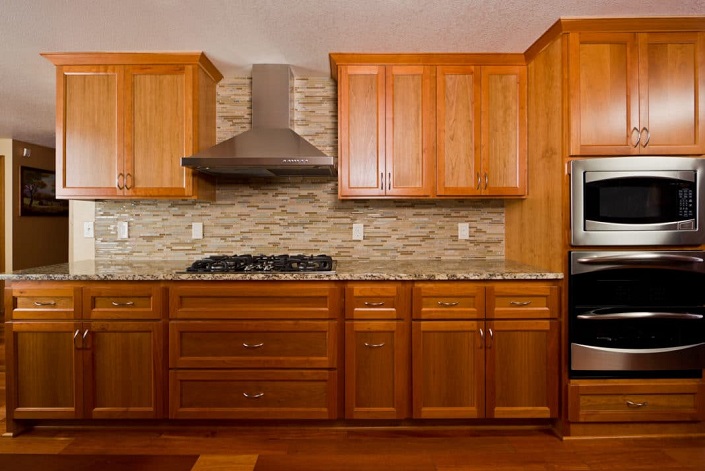
Sluggish with your old cabinets? Not working well? This is very natural. After two or three years using a time frame, your cabinets will lose the laziness or efficiency. Cabinets are the more pricey materials than the other elements. We can’t think of a smart or modern kitchen without a cabinet. To store our day to day cooking Spices & others, we use them. So we need to use them more than any other furniture in the kitchen.
With the passing of time, cabinets lose their efficiency but we should not leave them for permanent retirement. With a few steps, we can again get the same laziness as we see at the early time. To do the job of cabinet refinishing is so easy or not so hard. If you are a dedicated refinishing job lover, then you can complete this successfully.
Top 10 steps to Refinish your Kitchen Cabinets
If you think that you can complete the task of cabinet refinishing, you should also be sure how much time you can give for this time. You should be committed to complete this work. It will take 4 to 8 weeks or 60 to 130 hours based on your working experiences. Any type of mistake can make this project failure. So follow these steps one by one attentively to get a good result.
Prepare Kitchen
At the starting point, you need to prepare your working area. That means to make the kitchen comfortable to finish your task efficiently. Open the cabinet boxes or drawers. Now remove the appliances from that place. To make it easy, you can place a piece of cloth underneath the drawer or boxes. Then keep the appliances on that cloth. Before starting this work, make sure that you have a good ventilation system. Or it can cause suffocation problems. For better ventilation, you can open the windows Doors & other free spaces.
Remove hardware parts
After taking all primary steps you should remove the parts of kitchen cabinets. By using the drill, you should remove all screws. Then take all existing drawers downs. There also have hinges to remove the boxes & cabinet doors. The design or the format of removing cabinet parts can be different. Better you can read out the catalog before removing them. Without eliminating these parts you can’t clean or paint your cabinets. So this role is very important for cabinet refinishing.
Surface cleaning
After removing all parts or the hardware of cabinets, you should clean your surface. Because of that time, the screws or the broken part of any hardware can have fallen on your surface. Not taking them out time can make any accident instantly. And it can also hurt you finally. Clean the surface carefully. Use materials to avoid any wrong incident. Removing parts of the cabinets can be mixed. So to maintain the serial, you can mark them with numbers. This will make your task easy. Do not paint or standoff over the marking points. Because the marks will help you to match the hinges too.
Self-protection with kitchen available spaces
When you are doing this role like painting the doors of cabinets or unscrewing the screw, you should make sure that the body parts of you are in a safe zone. That means for foot safety you can use boots then face safety from paints medicine you can use glass or helmet. To save the other appliances from unwanted staining, you can also spread a cloth on the appliances, countertop spaces, and floors. Make sure that you are wearing gloves & & glasses for your self-protection when cleaning the wooden parts.
Hardware soaking
For good cleaning, you can soak all the hardware in the kitchen sink for 30 minutes. To keep this task continuing, you may need a large shape sink. If you do not have a large-shaped sink, you can use the bath tab for some time. But be careful about the water lines. After 30 minutes soaking, you can scrub & brush them with a light water rinse. After completing the cleaning with water, leave these for a minute to make them dry completely. If these parts do not get completely dry, you can’t polish them properly. After cleaning, also leave them to be thirsty again.
Replace hinges
The maximum time we can see that after using more time the cabinets hinges became loose or broken or making spaces between the doors & boxes. So any kind of insects can go to the inner site & destroy the inner storage also. To avoid this uncertain condition, you should replace all the hinges of your cabinets. You can buy the same hardware as the same size as the previous one to get the same hole of hinges. Otherwise, you can fill the old holes & drill some new holes to re-screw the hinges with your cabinets.
Create a drilling template
Without creating any template of holes, these can be misplaced. So the best & most straightforward way is to draw a template to drill the targeted holes to attach the hinges with cabinets. Marking on an exact location, you can use the jig to have your template. To complete this step you need your drawers & boxes also.
Drill pilot holes
Your new cabinet wood may splint during drilling. To solve this problem, you can use pilot holes. By using the jig in that selected location, you can do this drilling. But you also need to take the help of an electric drill machine to make these pilot holes. It will prepare the pieces of new wood for screwing the hinges & prevent splintering by providing the guideline of your wooden screw.
Type of finishing & strip
This is the best time for stripping your cabinets. But the process should be tricky. Confirm the excellent ventilation system of that area. You may prefer the outside also. To determine the striping agent, you need to figure the type of your cabinet finishing. Now the question is how to know your cabinets type. Just drops a little amount of oil on your wooden pieces. If you find that the solution has dissolved, then it’s ok. For proper care of the removal, you can also apply shellac, lacquer, penetrating oil, polyurethane, paint, vinyl, varnish, or a water-based finish. Each of them has its significance.
Priming & Painting
After completing all tasks, you need to check whether you need to apply any primer. This is the step that you need to think about when you are going to paint your cabinets. For unfinished surfaces or drywall, you may need to apply the primer. There are so many types of introduction to applying in any kind of material. But you need to know the pros of that primer. The paint store can give this recommendation very well. When the bottom line of your cabinets is correctly prepping, then you can start painting this. Check out that there has no gloss of primer then paint it.
Final Verdict
The person who loves to take challenges then he or she can easily take this cabinet refinishing challenge. This project is not so easy for a newbie. You can take some additional help from your family members at the time of stripping, painting & sanding. These steps also will prove how much time consuming you are. By applying for these roles, if you feel energetic & saving the right amount of money, you can take this type of challenge for your other rooms. Also, we can visit our homepage for any kind of home or kitchen problem.