
Changing your kitchen sink drainage may have many reasons. A kitchen renovation is one of them. So when you are thinking about your kitchen remodelling you must be thinking about sink drain if it is not installed recently. It’s a common thing to replace the sink drain but sometimes we feel that without the plumber it is impossible to do.
No, nothing like that, you can also make this happen with some basic knowledge & the tools set you to need to unplug all parts from each other. Before you are going to do this make sure that you have another option for your other family members. Because a kitchen sink is an important part of our day to day home-based work.
The components you are going to install or replace can be different from the previous or the old sink drain. Depending on these differences this task can be easy or a little bit tight. So make first the alternative use option then start the works of sink pipe or drain replacement.
Require Materials or Tools to Replace Sink Drainage
We need some tools to unplug the pipeline. So you need to make sure that you have all those tools near to hand.
- Measuring tape
- Marker
- Hacksaw or the PVC tubing cutter
- Pliers for channel type
- Trap kit for kitchen drain
- Putty knife
- Pipe wrench
- Plumbers putty
- Silicone sealant
- Working gloves
- Safety glasses
- Socket wrench
- Adjustable wrench
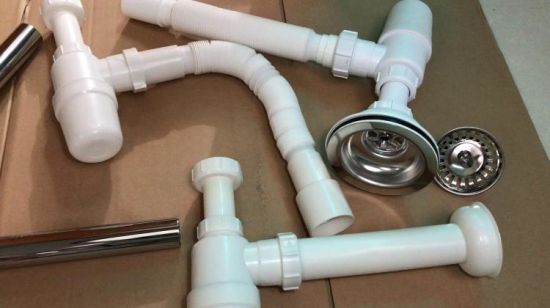
Parts of the sink drain line
Do you know all the parts of your sink drainage? If you have the minimum idea about all parts of drainage then it’s ok. But if you don’t have any idea about the drainage parts then you must need to read out this portion also. This is actually required to know the anatomy of replacing sink drain lines.
After removing the old sink or the drain line your task will be started from the drain basket. This portion is interconnected with basket strainer & flange, Rubber washer, pressure cup, Paper gasket then lock nut. Finally, the threads of the flange will be connected to the whole body with the drain line.
Instructions for Replacing a Sink Drain
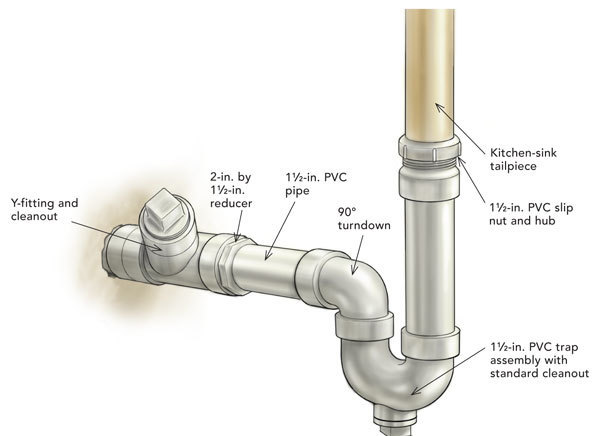
The total drainage consists of a sink basket, tailpiece which is a long straight pipe that came out from your sink, then P trap – the curved hook type tailpiece to connect two portions of the pipeline & finally the drain pipe that will go through p trap into the wall. Let’s start installing steps one by one.
Removing steps for an old sink
Step – 1
First, you should stop both water supply lines hot & cold. Naturally, you can find a temporary switch under your sink cabinet. Turning off this switch will shut off the water supply of your sink or basin only. For better performance, you can turn off the main switch of the waterline of the whole house. It can be found in the basement or the switch board room.
Step – 2
All the bucket lines should be also turned off which are relevant to this water pressure. Apply the adjustable wrenches to separate the lines of this bucket also. Make ready a small bucket also to store the water if left in that water line. You can leave the sink attached to the bucket.
Step – 3
The next option is the garbage disposer line. If there is any garbage disposer then turn off the threshold first then unplug. Apply pliers to disconnect the P trap & drain pipe. To catch the excess water from the drain line you can put a bucket underneath of it. Next to remove the dishwasher line.
Step – 4
To remove the disposer chamber you should follow the instruction of the manufacturer. If you exactly don’t have any manufacturer guidelines for this disposer then this is not a big deal. After passing some days we can lose this type of paper. So the better option is to wait for you. According to the model number of your disposer search on their website. There you will get the instruction guide.
Before unplugging this disposer box or the container make sure that your bucket is also ready to catch the untwisted or twisted garbage & water of it.
Step – 5
Unplug the metal clips from the underneath of the sink perimeter. To lose them use the screwdriver then socket wrench or open-end wrench. Oscillation towards the sink bowl.
Step – 6
All sides of the sink will be caulk with the sink so you need to use a utility knife to lose all around. Now you need to push up from the underneath side to lift away the old sink.
Step – 7
To remove the grimes, putty & caulk from the base of the sink countertop use a putty knife. Clean all the components to reinstall the new one as usual.
Steps for Installing a New Sink
Though you have removed the old sink yet so you can now clear all types of debris beside it. Make sure the measurement of the old sink & the new one is perfectly ok. Or the sink will not be well fitted with that gap.
Step – 1
If you find out that the new one is not well fitted with those previous measurements then use the jigsaw or tile cutter to make proper space. If the new size is smaller than the old one then what will you do? Use a piece of caulk to cover the gap. It can fill the gaps between ¼ inch with the surface body side. If your gap is larger than this size then bead of caulk & wait & wait until it is completely cured.
Step – 2
Remove from the countertop & attach the clips towards the sink bowl. Then you need to install the components of all faucet lines. Put some plumbers putty around the strainer & install it by pressing against the putty.
Step – 3
To secure the rubber gasket with thread flange tilt the sink from the underneath side of the sink. You may need to repeat this step for some additional drainage without any kind of disposer. To make it look good, remove the excess putty with the help of a soft towel.
Step – 4
The maximum sink comes with garbage disposal so secure your drainage line. With a screwdriver, you can install this mounting bucket at the bottom of the sink & don’t forget to follow the manufacturer’s instructions also.
Step – 5
Fore basin edge purpose: use a bead of silicone sealant. To match with the metal attachment clip rotate it from the bellow side to outward. Then finally tighten all clips with nuts or screws.
Step – 6
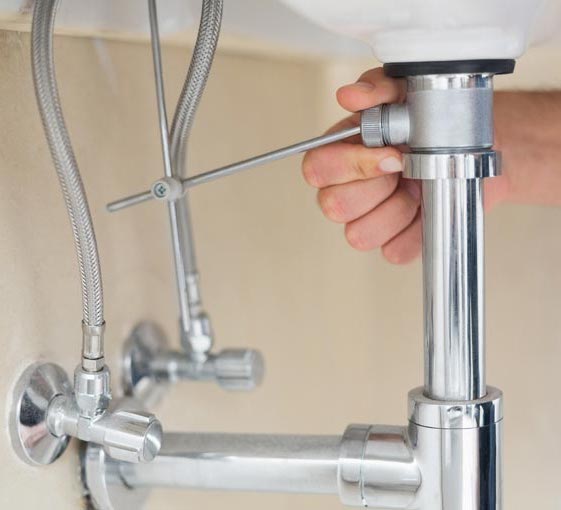
To attach the water supply line with the sink faucet use the socket, gasket whatever you need to tighten the connection. Just keep in mind that over tighten or more stripes can break the threads also.
Step – 7
By following the company instruction guideline install the garbage disposer container if you have. Then connect the discharge pipe also to disclose it. All connections should be tightened & clamped to make sure to recheck all connections again. Or the total investment will fail finally. Apply the same formula for installing your dishwasher also.
Step – 8
Here the pipe of disposer discharge is waiting for you. With the drainage pipe & the P trap pipe, you need to reconnect it. If the drainage pipeline is not perfectly connecting with your old pipeline then you can make some adjustments. It can be too long or too short from the sink line. So measure the required length of pipe. Adding a little bit extra length can help you to get a perfect measurement. Before cutting the pipe wear the safety glasses.
Step – 9
To connect both pipe heads you can add the slide slip nut first then a washer. Make sure they are facing in the appropriate direction. Holding at the right place tight the slip nut & screw.
Step – 10
After finishing the lower part, the connection here comes on the basin’s perimeter. Use a bead of sealant to stop leakage or movement problems. This will fix it with the sink surface properly. After checking all connections you can power on the disposer then the waterline. Check whether there is any leakage or not.
Final thought
After completing all those steps if you find any leakage then turn off the sink water line instantly. The leakage from the basket strainer means the minimum one connection is still loose. Tight the tailpiece of brass than the plastic connector then test the line again. I hope this content will definitely help you to replace your kitchen sink & drainage line successfully. If you have more questions about this topic then let us know.